Adapters are the bridge between today’s mirrorless bodies and yesterday’s affordable glass, but not all bridges feel the same underfoot. This guide explains how adapters work in practice, what usually delivers the best autofocus, which types of adapters exist (and when to use each), plus the real-world pitfalls that trip people up.
How Adapters Actually Work (The Flange Distance Rule)
Every mount has a flange focal distance: the space from the mount face to the sensor. If your camera’s flange distance is shorter than that your lens was designed for, you can add a precisely machined spacer and still focus to infinity. That is why DSLR glass, such as Canon EF at about 44 mm and Nikon F at about 46.5 mm, adapts cleanly to modern mirrorless mounts that sit closer to the sensor, typically in the high-teens to about 20 mm. If the camera’s distance is longer than the lens’, you would need corrective optics inside the adapter to hit infinity, and image quality usually suffers.
Bottom line: DSLR to mirrorless is usually great. Mirrorless to mirrorless or DSLR to DSLR rarely makes sense unless you really need a specialty optic.
The 'OEM Trinity' Advantage

Practical rule: For paid work that depends on tracking or eye detection, start with a brand-matched lens, adapter, and body. Use cross-brand adapters to unlock value or special rendering when your focus needs are less demanding.
Adapter Types (What to Buy and Why)
1. Mechanical or 'Dumb' Adapters

Strengths: Zero firmware drama, very robust, cheapest path to unique rendering.
Limits: No electronic aperture on lenses without rings, no EXIF, no autofocus, and you must enter focal length for in-body stabilization on many cameras.
Who should consider: Portraitists who love old rendering, filmmakers who want repeatable manual focus throws, landscape photographers, and anyone building a character-glass kit on a budget.
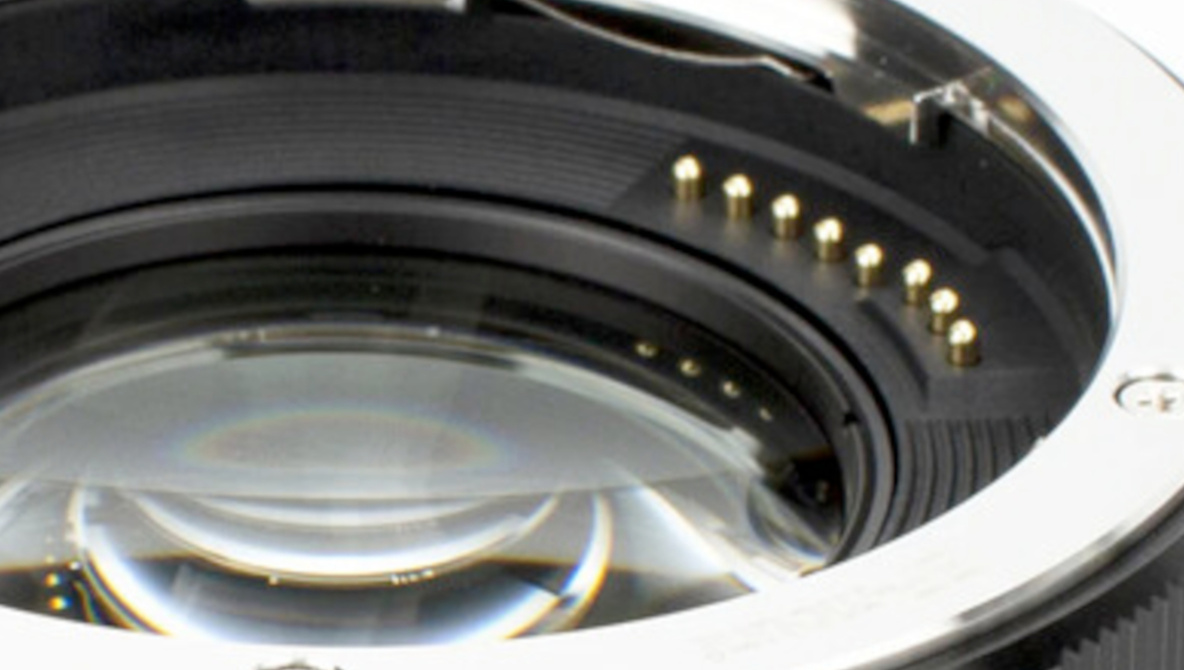
2. Smart Electronic Adapters
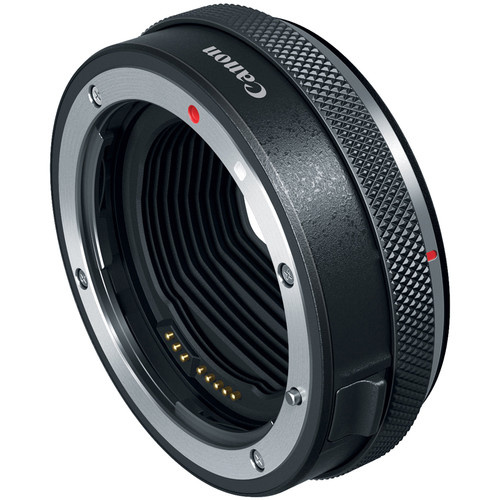
Strengths: Modern autofocus, full aperture control from the body, metadata passthrough, and cooperation between lens IS and IBIS. Many include a USB port for firmware updates.
Limits: Performance varies by camera, lens motor, and firmware. Continuous autofocus and eye detection can be a notch below native in difficult light, depending on pairing.
Extra controls you may get: Some smart adapters add a programmable control ring or an assignable function button you can map to aperture, ISO, exposure compensation, or AF mode.
Who should consider: Anyone adapting modern DSLR glass and expecting the lens to perform to its maximum capabilities.
3. Drop-in Filter Adapters
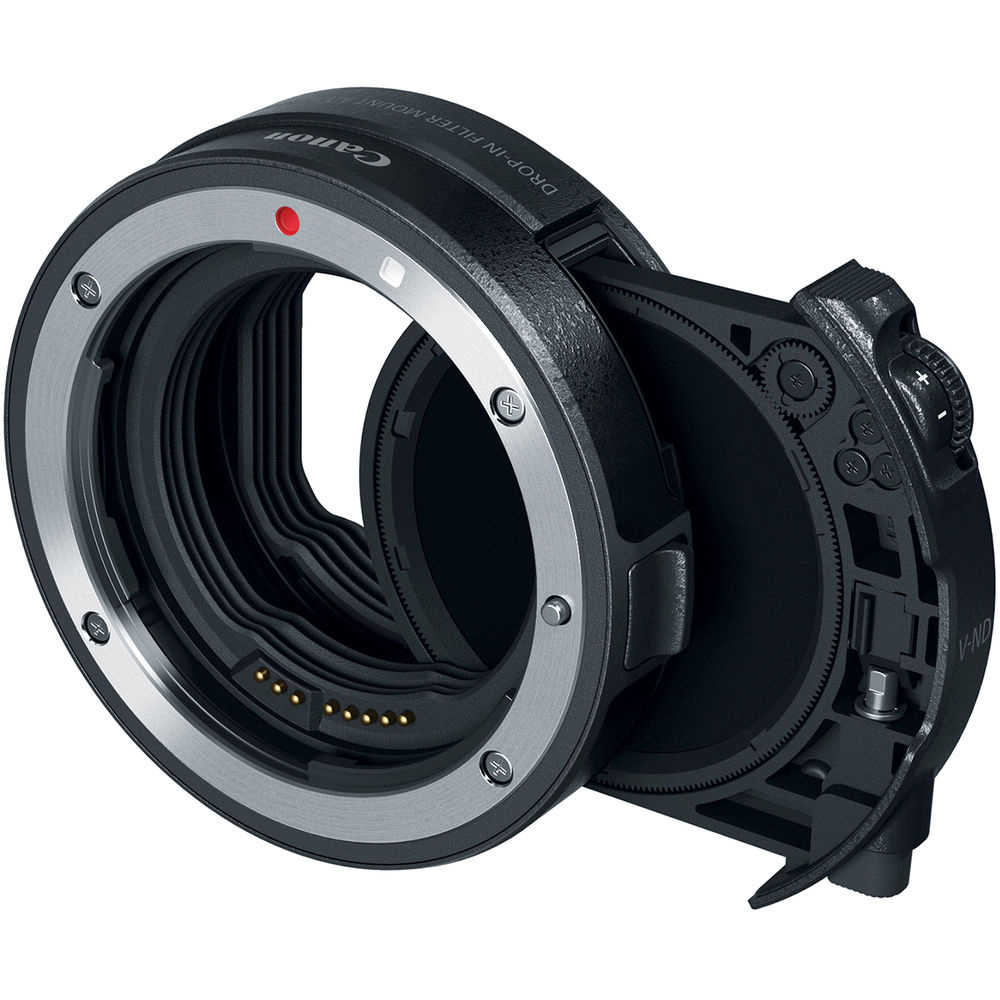
A slot inside the adapter accepts a compact ND, clear, or CPL cartridge. This keeps filtration behind the lens, which is a lifesaver for ultra-wide lenses with bulbous fronts or mixed-thread kits.
Strengths: One high-quality ND or CPL serves your entire adapted set. Swaps are fast, fingerprints stay off front elements, and gimbal setups stay simpler.
Limits: Proprietary filter cassettes sometimes cost more than standard front filters; some combinations vignette at extreme wides if you stack filters.
Extra controls you may get: On some systems, the control ring variant and drop-in variant are separate; choose the one that matches your workflow.
Who should consider: Landscape photographers.
4. Focal Reducers, Also Called 'Speed Boosters'
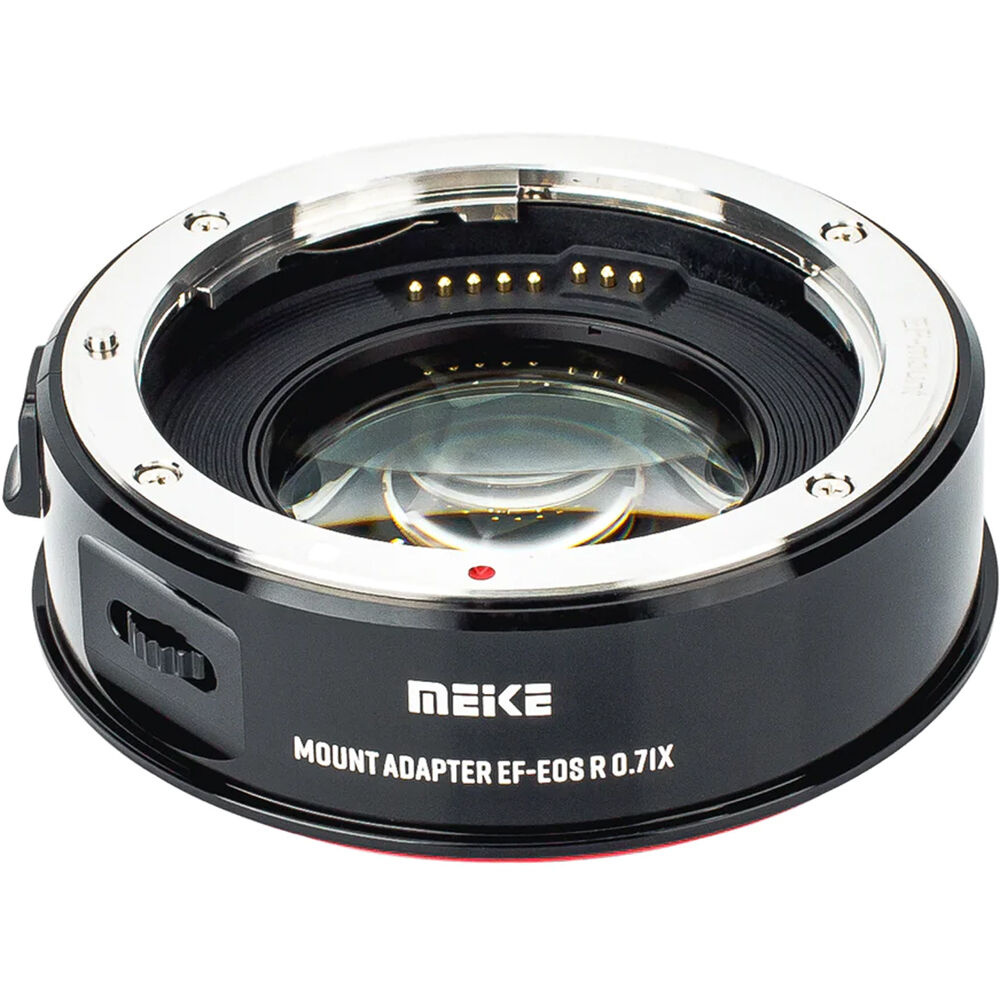
Strengths: Wider field of view, brighter effective aperture, and a look many people associate with larger formats.
Limits: Only for lenses projecting a larger image circle to a smaller sensor. Not for full frame to full frame. Quality depends entirely on the reducer design; cheap optics smear corners or add color fringing.
Who should consider: Filmmakers on APS-C or Micro Four Thirds, and still shooters who want a “full frame-ish” field of view and brightness from DSLR glass.
5. Specialty Adapters (Tilt-Shift, Helicoids, Macro Tubes)
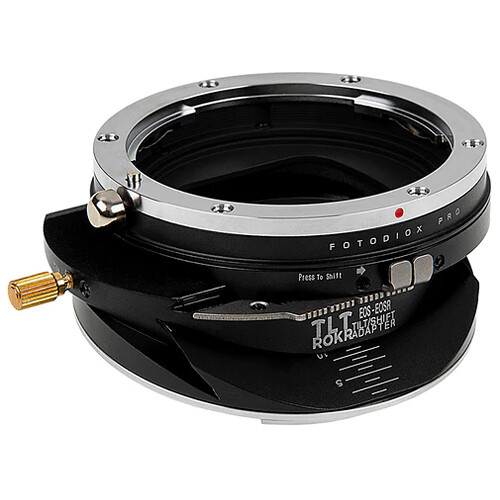
Strengths: Creative control without buying new lenses. Fantastic for tabletop, product, and architectural experiments.
Limits: Manual focus only; some combinations vignette heavily or soften corners.
Who should consider: Product shooters, macro enthusiasts, and anyone who wants movements without investing in dedicated tilt-shift lenses.
Autofocus Behavior: What Actually Matters
Lens motor type: Ring-type ultrasonic motors and modern stepper motors adapt best. They start and stop cleanly and tend to be quiet, which helps both stills and video. Older micro-USM or geared designs can chatter, overshoot, or hesitate in low contrast.
AF mode and area strategy: Across brands, single-shot autofocus is the most consistent with adapted glass. For continuous tracking, use tighter AF areas or expand-small patterns instead of full auto-area, especially in clutter, and most importantly, respect the OEM trinity. Eye detection on adapted lenses can be excellent in good light and modest subject motion, but expect the camera to fall back to face or zone detection sooner than it would with native glass unless you're again following that trinity.
Firmware discipline: Update the camera and the adapter. Many adapters receive meaningful autofocus and compatibility upgrades over time; a single update can turn a so-so combo into a dependable one.
Stabilization, Metadata, and Corrections
 IS plus IBIS: Lens stabilization and in-body stabilization can cooperate. Some cameras prefer lens IS beyond certain focal lengths while relying on IBIS at wide angles; others combine axes. Judge by the steadiness of the viewfinder and the keeper rate, not just the spec sheet.
EXIF pass-through: Good smart adapters write lens model, focal length, and aperture to metadata. That helps IBIS set the proper correction, enables better catalog search, and keeps automatic corrections consistent.
Lens corrections: Do not assume your mirrorless body will apply distortion, vignetting, or chromatic aberration profiles to adapted lenses the way it does to native glass. Plan to correct those in your raw processor, or build per-lens presets for speed.
Crop behavior: Lenses designed for smaller image circles will often trigger an automatic crop mode on full frame bodies. If your camera does not auto-crop, be ready for heavy vignetting and turn the crop on manually.
Common Gotchas (And How to Avoid Them)
Mechanical play: Cheap adapters can wobble at the camera side, the lens side, or both. That tiny tilt shows up as uneven sharpness. Pay for tight tolerances and test.
Light leaks: Rare, but long exposures can reveal streaks from adapter seams. In a dark room, open the shutter on bulb, shine a small light around the adapter, and check the preview.
Infinity focus: Bad machining means you cannot reach infinity or you overshoot it. Confirm on a horizon or a bright star.
IBIS prompts: With mechanical adapters, many bodies ask for focal length. Enter it correctly or stabilization will fight you.
Battery and wake behavior: Some smart adapters keep lenses “awake.” Learn your camera’s sleep settings, and power cycle if autofocus starts to feel sluggish after long idle periods.
Speed booster clearance: Always check the maker’s compatibility list so rear elements do not collide with shutters or IBIS mechanisms.
Quick Buying Checklist
-
Confirm the mount direction is correct, for example, “EF to Z,” not the reverse.
-
Decide between a mechanical spacer and a smart electronic adapter based on whether you need autofocus and electronic aperture.
-
Check for a supported-lenses list and an active firmware history.
-
Test single-shot, continuous, and eye detection with your most demanding lens.
-
Verify stabilization behavior and EXIF pass-through.
-
Inspect mechanical fit, look for light leaks, and confirm infinity focus.
-
If you shoot wide angle or video, consider a drop-in ND adapter to simplify filtration.
-
On APS-C or Micro Four Thirds, choose a quality speed booster if you want wider field of view and extra brightness.
FAQs
Will adapted lenses focus as fast as native?
With the brand-matched lens, adapter, and camera, single-shot autofocus often feels native and continuous autofocus is the best you can expect from any adapted setup. Cross-brand smart adapters range from good to awful; always test continuous tracking and eye detection before paid work.
Is video autofocus reliable with adapted lenses?
Sometimes. The brand-matched trio gives you the highest odds. With cross-brand adapters, be ready to use manual focus.
Do I lose image quality?
A well-made adapter that contains no optics does not change image quality. Speed boosters add glass on purpose; high-quality designs look excellent, while cheap ones can smear corners or add color fringing.
Should I just buy native?
If flawless continuous tracking and zero surprises matter most, native is simpler. If you want value, specific focal lengths, or a favorite rendering, adapting can be the smarter move, especially when you stick to the brand-matched trio for critical work. They're also a great choice if you have a vast library of DSLR lenses.
Bottom Line
Use adapters to unlock value and looks, and lean on the brand-matched trio whenever autofocus consistency is mission-critical. Keep firmware current, pick adapters with tight machining, and run a five-minute test for fit, infinity focus, stabilization, and tracking. Do that once, and adapted lenses stop feeling like a compromise and start feeling like the savviest way to stretch your kit.


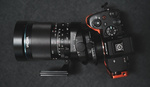
When I switched to Mirrorless with the Nikon Z5, I used my F mount lenses with the FTZ adapter. I also purchased an Viltrox EF-Z adapter to use the Canon EF 300mm F/2.8 USM non-IS lens which had been sleeping in my closet for +25 years. After each Nikon firmware update, the adapter would malfunction.
The lens was considered as a 24-70 f/4 but with a focal length of 213mm. It worked with my Z7 II, but not my Z8, last summer in Namibia.
After trying it with a Canon 17mm f/4 TS-E I sold it and replaced it with a Fringer EF-NZ II.
It's twice the price of the Viltrox, but you quickly understand why, better built, better service...
Within 24 hours, they published a firmware update after the Z8 3.00 update.
Don't forget you lose weather sealing with adapters.
Until native E-mount macro lenses were released I adapted a vintage Micro Nikkor 55 f3.5 with a non-communicating adapter and a Minolta 100mm f2.8 macro with the Sony autofocusing A to E adaptor, and these worked as intended.
With Canon EF/EF-S to RF adapters weather sealing is not lost unless the lens doesn't have sealing at the mount.
I use a control ring adapter for my EF lenses. All functions including all AF modes, IS and other features are 100% the same or for me my EF lenses perform much better.
Remember ALL EF/EF-S lenses are 100% compatible with RF mount Canon cameras. So no worries using Canon adapters.
Yes, I know that Nikon F to Z adapted lenses are hit and miss including if they will even AF depending on the F lens you have. So that can be a problem and you must check the charts that say what works with what.